
Live streaming special: Stream if you want to go faster!
Posted on Jul 27, 2020 by Adam Duckworth
Move your filmmaking business into the fast lane by adding live broadcasting to your portfolio the easy way
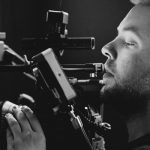
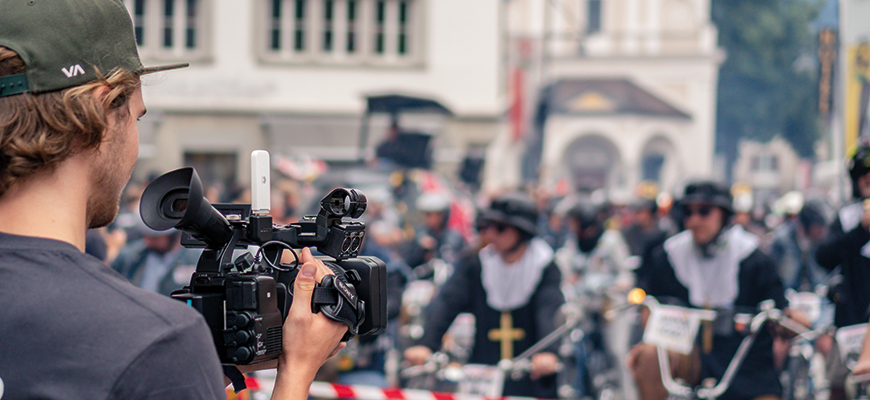
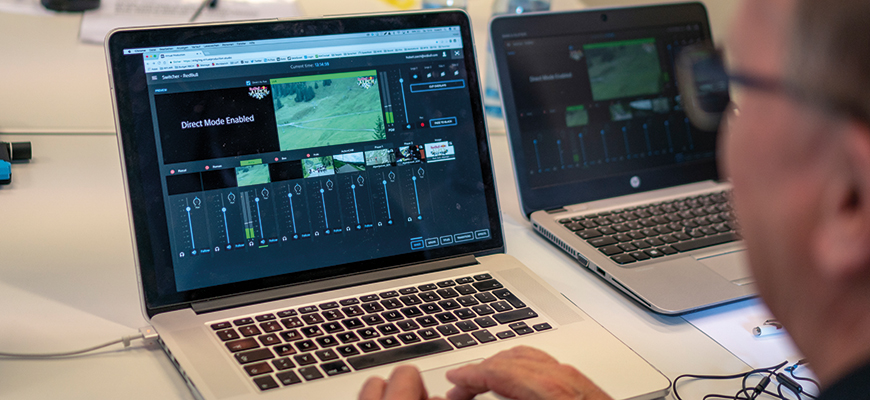
Cover picture: This fun motorbike race was livestreamed for client Red Bull. If you master streaming, there are lots of opportunities
From Amazon Prime and Netflix to social media, live streaming video content is everywhere nowadays – fuelled by the huge increase in download speeds to desktop computers, smart TVs and mobiles. And while many may dream of making the next big-budget blockbuster, the reality is that for the independent filmmakers, many of their existing clients are looking to get their message out across via YouTube, Vimeo, Periscope and Facebook Live. And the global Covid-19 pandemic has only accelerated this demand.
With millions of people being ordered to stay at home and keep a safe distance from others to avoid infection, the demand for live broadcast of just about anything you could think of – from religious services to new product launches, fitness and business coaching – is going through the roof. And when the coronavirus nightmare comes to an end, it’s highly unlikely things will return to the old version of ‘normal’.
 Personalised live streaming of niche content will be here to stay
Personalised live streaming of niche content will be here to stay, and many clients will search for more professional services rather than social media-based streamers. Many may have dipped a toe in the water with their social media intern waving an iPhone around for a Facebook Live broadcast, but there has quickly been the realisation that this doesn’t represent a brand in a professional manner. If you already make corporate films and branded content for various organisations, you are in pole position to step in as the filmmaking expert who can shoot and stream events.
It’s not just being able to actually get content out there, it’s about the quality of that content. Filmmakers already have the majority of gear – cameras, lenses, support, lighting and audio equipment – and the expertise required to produce a professional-looking production.
But suddenly, the need for wafer-thin shallow depth-of-field from large-sensor cameras, anamorphic lenses, Log and LUTs are not front of mind. Instead, it’s multicamera set-ups and live switching between them, on-screen graphics and reliable Wi-Fi that are more important. As is getting everything in sharp focus, rather than self-congratulating about wonderful bokeh and cinematic focus pulls. It’s far more like being a live TV news broadcaster than a Hollywood filmmaker. And that takes new skills to learn, some different kit and a desire to do something new that clients might actually be willing to pay for.
So take a dive into the world of live broadcasting for filmmakers in the Pro Moviemaker guide to streaming, from the very basics to the more advanced. In our 11-point plan for streaming success, we take a look at some of the kit you might need, and check out some of the basic software and technical skills you should be looking at mastering.
1. The basics for free
Presuming you own a smartphone and have Wi-Fi or a reliable 4G connection, then you can stream right now without any extra cost. The two most popular streaming outlets are Facebook Live and YouTube Live, and all you need to do is log on to those apps and follow the instructions on screen. It’s as simple as that, and you’ll be broadcasting your message within seconds. And Facebook or YouTube saves the broadcast so anyone can watch it again later.
This simplicity, of course, can be a bit of a problem as some clients think that’s all there is to it. Zero cost and hassle or planning, but also very low quality. It’s a single, often wobbly, handheld camera with awful audio, and you can’t add any graphics. And you won’t have the footage to edit properly later.
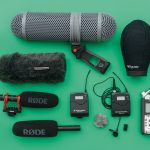
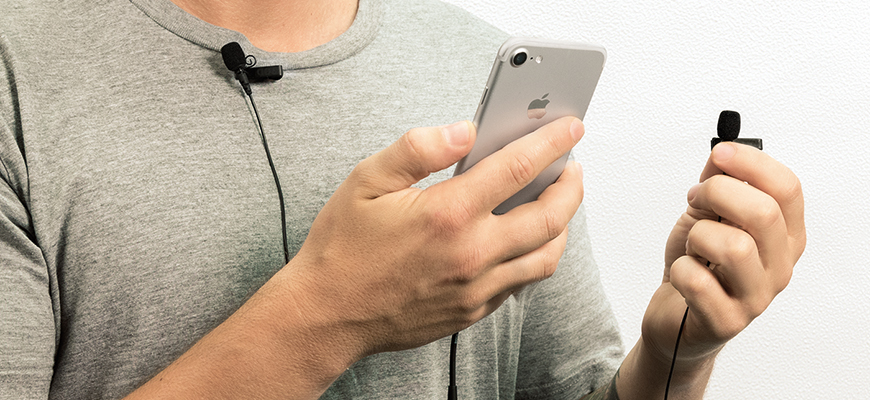
It’s not hard to make this footage better, though, by simply using a smartphone mount on a tripod to take out the wobbles and adding a proper mic. This makes a huge difference to audio quality, which is often the biggest let-down, just as in normal filmmaking. There are several adapters that allow you to plug a decent mic into an iPhone socket that are ideal for a single mic. Or use a mic designed for the job. The Sennheiser ClipMic Digital is a lav mic that plugs right into an iPhone, while Zoom’s iQ6 X/Y and iQ7 Mid-Side both have two adjustable mics, while the Shure MV88 has a stereo and directional pickup.
There are several adapters that allow you to plug a decent mic into an iPhone socket that are ideal for a single mic
Saramonic has a range of options, from the basic SmartMic that plugs into most phones to the stereo version specially for Apple smart devices. There is also a range of mic adapters with USB-C connections, a SmartMixer (which is a lightweight audio mixer for phones) and the SmartRig+ Di, which has a two-channel audio interface that can provide 48V phantom power for XLR mics, yet plugs into your iPhone.
Rode has a whole range of options, such as VideoMic series, which is a directional mic available for Apple phones or other smart devices, a Lavalier Go mic, i-XY stereo mic ideal for music performances or i-XLR, which lets you use a professional XLR mic in an iOS smartphone.

But it’s always an issue to have more than one person talking, so something like Rode’s SC6-L Mobile Interview Kit is ideal as it’s a small box that plugs into an Apple iPhone’s Lightning socket. It has tiny wired SmartLav+ lapel microphones and a further socket into which a set of headphones can be plugged for monitoring. It’s controlled by the free Rode Reporter app, which lets you configure record modes and adjust the mic pre gain.
If you are using your phone or tablet to stream to Facebook or YouTube Live, or any of the other platforms, any of these audio solutions will transform the sound into something far more professional.
2. Invest in a small streaming system
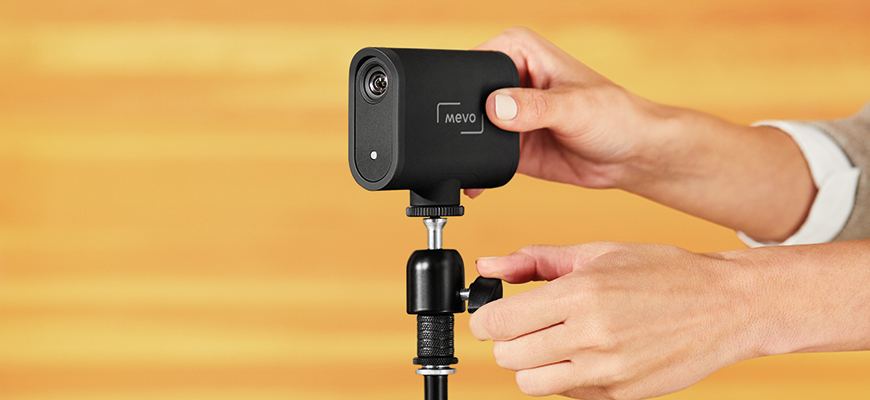
One alternative for easy streaming is to invest in a 1080p live stream Mevo Start or 4K Mevo Plus streaming camera. These cameras wirelessly link to your iPhone, which not only acts as the streaming device – via Wi-Fi or cellular – but also lets you control the camera from its own app. There are basic audio inputs or a built-in mic, and the camera has a wide-angle 150° lens.
The 4K Mevo streams in HD, but can record in 4K to a MicroSD card for editing later. The cameras also stream to more than just Facebook Live and YouTube, and are ideal to plug into a computer. They can be especially useful as a backup camera or wide-view/general-view camera for multicamera streams.
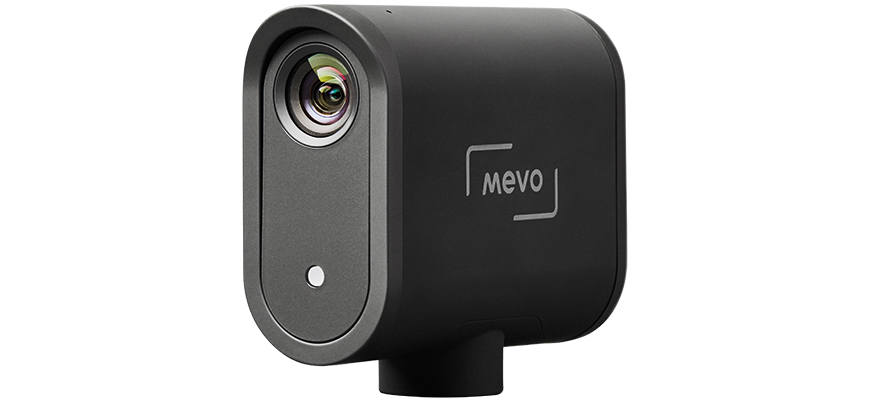
If you just want to use the Mevo to offer basic single-camera streaming, then you can invest in the Mevo app, which dovetails with Vimeo for streaming. There are overlay graphics, livestreaming to multiple destinations, loads of stats so you can see who has been watching, and a lot of storage on Vimeo, where your streams are held.
Alternatively, you can buy Wi-Fi web streaming devices such as the Epiphan Webcaster X2, so you can plug in your camcorder via HDMI and it streams directly to your Facebook Live or YouTube accounts as it comes preconfigured with their settings. It can also plug in via Ethernet. It’s simple, but is ideally for things like webcams rather than professional streaming.
You can use a simple HDMI switcher to connect more than one camera to the Webcaster, but many don’t work properly for video from cameras. And audio is a problem as the switcher takes video and audio from each connected camera, where you might want to stick with a single, specified mic.
3. Simple streaming via your computer
To provide more control, streaming from your desktop or laptop computer can also be free to Facebook or YouTube, and just as simple. Alternatively, other free wide-audience platforms include Instagram, Twitch or WeChat.
Many people are now using private or secure-audience streaming services like Zoom, Skype or GoToMeeting, or solutions built into larger programs like Google Hangouts or Microsoft Teams. Or you can even monetise content on Patreon, BoxCast, Twitch, Vimeo or YouTube.
All these use the same technology and, at the basic level, use your computer’s own webcam and mic, so again quality isn’t great. But there are ways to improve it.
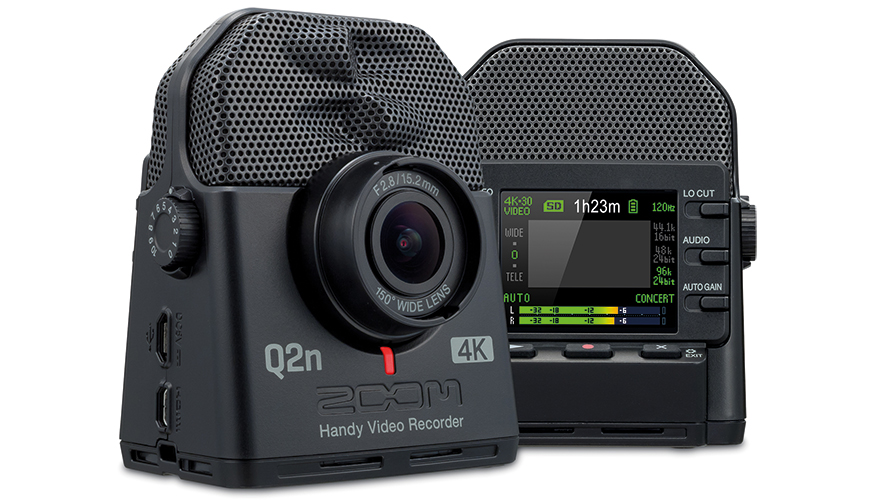
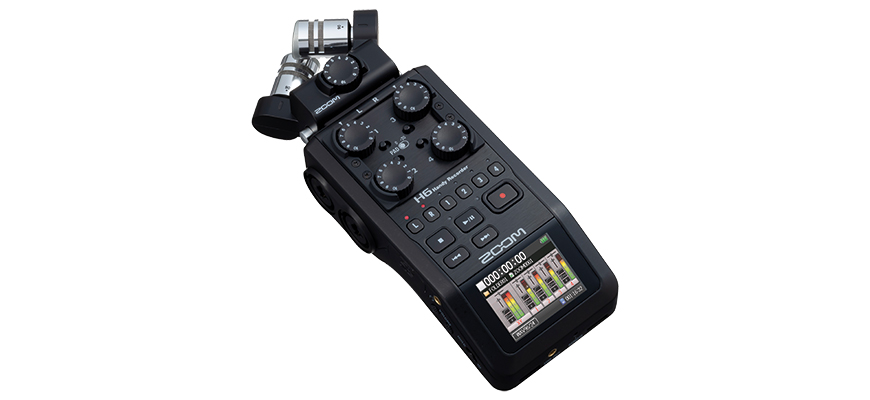
One very simple option is to use a Zoom Q2n-4K, which is a combined mic, recorder and 4K streaming camera all built into one small unit. Its quality is way better than built-in webcams, plus it actually records the whole session to a memory card and it can be plugged directly into a laptop or iOS device for instant livestreaming to Facebook, YouTube or the like. And, of course, you have the advantage of having the footage and audio to edit later. Its lens is super wide with a 150° viewing angle.
There are professional upgrade options for webcams, such as the £1170/$995 Panasonic UE4, which supports 4K recording or HD and has a 111° wide-angle lens. It can be controlled in terms of pan, tilt and zoom via USB and works as a USB webcam or as a streaming camera over a Wi-Fi network.
If you want to stick with your built-in webcam, it’s a good idea to improve the audio. There are lots of mics that can be used
If you want to stick with your built-in webcam, it’s a good idea to improve the audio. There are lots of mics that can be used, especially if you buy an inexpensive 3.5mm jack-to-USB adapter or a suitable headphone and mic splitter cable for use on the latest Apple MacBook Pro laptops. Just plug in a mic designed for a DLSR or mirrorless camera, or one designed primarily for podcasting, and the audio will be improved. Chances are you will need to up the gain on your mic.
If you have a recorder like a Zoom, then you can plug your DSLR mic into that and then plug that right into your laptop. And if it’s one of the bigger Zooms, like an H4N Pro or H6, you can plug XLR mics into it, too, as it acts like an analogue-to-digital converter using its own preamps. So you can use any mic you already own, and mix them on the Zoom.
Of course, you can buy separate audio mixers if you plan to mix the audio from several mics. The £549/$599 Rode Rodecaster Pro integrated podcast studio is one of the easiest and best streaming audio mixers you can buy, which takes four XLR inputs and lets you mix the levels for each. So you can mix lav mics, radio mics and stereo ambient mics, if you like. Then output the overall result to your computer via USB.
Alternatively, for a single-mic set-up, you can plug in one of the newer breed of USB mics, such as the tabletop-style Rode Podcaster, NT-USB or NT-USB Mini, which are high-quality studio mics ideal for voice-overs or podcasting. You can even use the NT-USB on an iOS device using the Apple Camera Connection Kit.
If all this seems like a lot of trouble and complication just to stream to Facebook or YouTube using your computer’s own webcam, then you’re right – it is. It’s far better to use a more professional camera.
4. Using a‘proper’ camera
Any pro worth their salt will want to use a professional-style camera rather than a webcam, for the quality and look you can get from a larger sensor. But it’s not as simple as plugging your mirrorless wonder cam or camcorder into your laptop and streaming, as the camera will output a high-resolution signal while streaming requires a low data rate 720p HD.
So you’ll need an internet broadcasting device or encoder – or a more basic HDMI capture card – to turn your camera signal into something a computer can stream. AJA makes the £432/$345 U-Tap encoder in both HDMI and SDI versions and Blackmagic offers the £450/$495 H.264 Pro Recorder/Encoder with SDI and HDMI.
If you want to go bargain basement, a basic web streaming capture card costs half that and lets you plug in an HDMI lead from your camera, then your computer sees the device as a USB camera.
But many devices like these are built for gamers and don’t work perfectly with high-resolution cameras. And if, for example, you’re inputting audio separately, then there is often a delay between the audio signal and the video signal of up to a second. In that case, you’d need some dedicated live software in order to set a delay to audio so it matches up with the video signal.
It’s better to invest in dedicated pro equipment that gives you more for your money
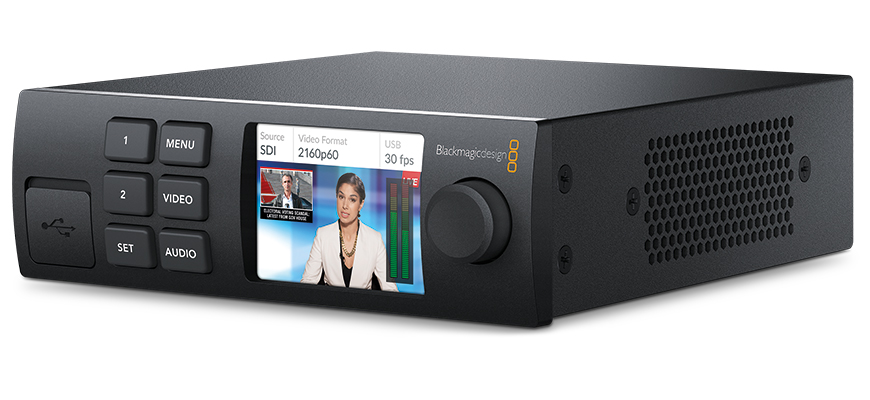
It’s better to invest in dedicated pro equipment that gives you more for your money, like the £699/$699 Datavideo NVS-33 video encoder or £455/$495 Blackmagic Web Presenter, both of which take an input from an HDMI or SDI camera.
It can be as simple as plugging your camera into the encoder box, then plugging the device into your computer’s USB socket. Your computer sees the device as a USB camera, and you can stream instantly.
The Blackmagic Web Presenter includes 12G-SDI and HDMI 2.0 inputs with support for all formats up to 2K/60p. There’s also an SDI output so you can record a full-resolution master for editing afterwards. You also get balanced XLR audio inputs for connecting professional microphones, along with RCA hi-fi inputs for connecting iPhones and other audio sources.
If you add on the £79/$85 Teranex Mini Smart Panel, it turns the Blackmagic Web Presenter into a broadcast-quality two-input live production switcher. The panel adds push button controls and an LCD screen, so you can swap between two live cameras. But, of course, it’s difficult to monitor this compared to a proper switcher with separate monitor screens.
The Blackmagic Web Presenter is a better set-up for a simple, single live camera input and a second input such as a slide show or pre-prepared video on a computer linked via HDMI. Then you can switch between them, complete with built-in dissolves.
5. Master the software
Facebook Live, YouTube Live and Zoom are popular because they are so simple and user-friendly, but they offer a lack of control that professional filmmakers would want – especially if they are selling the service to clients. The first step into more professional results is to get to grips with software.
If you only want to stream on YouTube or Facebook, but want to add transitions, captions or lower-thirds themes, inexpensive software such as justbroadcaster.com is ideal.
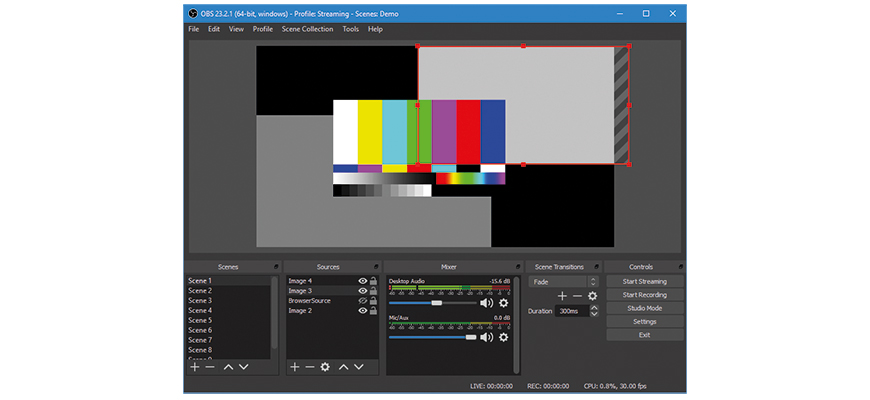
But OBS (Open Broadcaster Software) Studio is probably the most popular software, as it’s free and works on Windows, Mac and Linux. From there, you can broadcast your stream to many of the streaming services such as Twitch or Livestream, as well as YouTube, Facebook or Vimeo. Download OBS from obsproject.com, and run the auto-configuration wizard, which automatically tests your system and finds settings that your PC can handle, including streaming or recording, resolution, bit rate, encoding capabilities and streaming providers.
To get started capturing, you need to add source inputs – which can be from a Blackmagic Web Presenter – your computer’s webcam and separate audio inputs if you have them. You can then mix between them – disabling camera audio if you’re using a separate mic.
You can also set scenes for things like opening credits, welcome screens etc. You then key in the settings for where you want to stream to, including bit rate. These are found in whatever streaming service you are going to use, such as YouTube. And you’re ready to stream. If there is a delay between your audio and video picture, OBS lets you adjust it so it matches. It’s a powerful program and one you should learn the basics of to get the best out of your streaming.
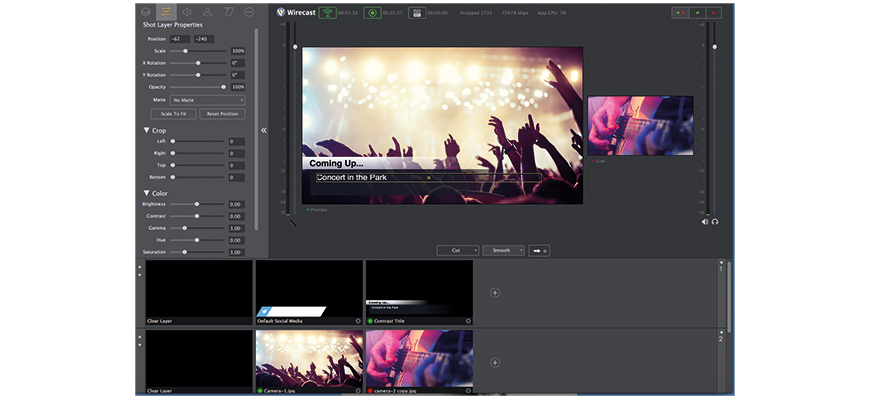
Other options include Telestream Wirecast, which is a live production software that lets you switch between cameras, add transitions and effects, mix audio and output to any major streaming service. This works on a subscription model. And XSplit Broadcaster is a popular audio and video mixing software, but is Windows only.
6. Pick your streaming platform
Although Facebook Live and YouTube are the most popular wide-broadcast sites, the biggest player in professional streaming is Livestream, which is owned by Vimeo. Livestream is just one of the companies that you can sign up to that will provide the technology to take your video signal and broadcast it on the net.
Livestream can handle massive events with over one million simultaneous viewers, and can stream to computers, tablets and phones at the same time. It can also handle the front end, which allows your audience to log in and watch the footage either for free or paid for. And for a working professional, that could be something to add to your services for clients.
For example, sporting events or music performances can be streamed live to a specialist audience for a subscription or one-off fee. Your client can share the revenue with you, or pay you a fee for providing the service.
You could charge for livestreaming a wedding, for example, password-protected so only invited guests from around the world could watch. And now many companies want to launch products and services to a worldwide audience, for which they will pay handsomely for professional results. And you can also edit the live footage afterwards into something more slick, so the content can live on and be hosted for all to see. Pick the right streaming platform and there are lots of business opportunities.
7. Get serious about multiple cameras
One or two cameras are fine, but for a truly professional production, it would be best to run multiple cameras. Of course, many of the units built for this are for TV use and are therefore expensive. The Telestream Wirecast Gear all-in-one system is at the bottom end, and is around six grand, while the Livestream Studio and Livestream Production Switcher or Epiphan Pearl-2 can do 4K livestreaming, switching and recording to an internal hard drive with up to six video sources. Or a 16-input Newtek Tricaster TC1, which is a top-line unit good enough for TV broadcast, but costs over 20 grand.
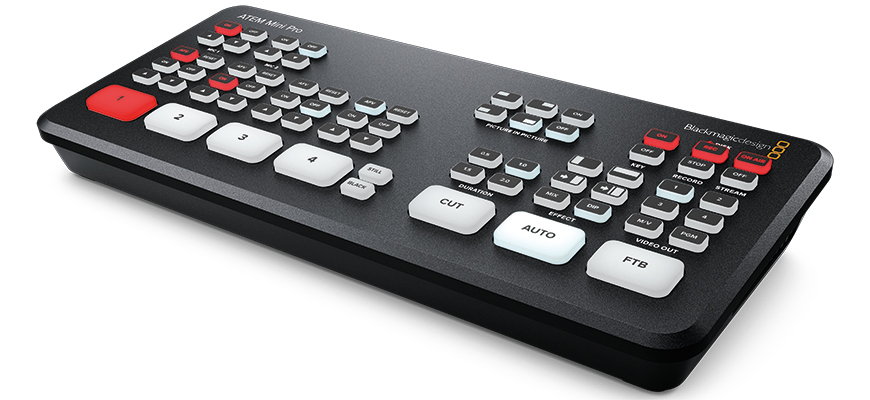
A popular choice is a Blackmagic Atem, and the latest of the range is the affordable £275/$295 Atem Mini, which can handle up to four HDMI inputs from cameras, and the brand-new £654/$595 Atem Mini Pro, which has even more features. The Mini has a two-channel audio mixer and can go straight into your computer for streaming via a webcam-out socket, so essentially your computer ‘sees’ it as a webcam. The Mini Pro has far more output options, such as the recording of streaming data to USB flash drives and direct streaming output via Ethernet and HDMI.
For larger productions, you could move up to the Atem Television Studio HD for £899/$995, which is an eight-channel SDI and HDMI switcher with ten-channel audio mixing and a small screen on the front. You then connect your computer to the Atem using an Ethernet cable or Wi-Fi, and use the Atem software on your screen as the switching software. The bigger Atem units are very sensitive to frame rates and resolutions, so all your input cameras need to be the set to the same. You may have to use a separate format converter device if you use different cameras that can’t be set to match. But the Mini automatically scales video inputs to make things easier.
However, the cheaper Atem Mini doesn’t have multiple camera viewing outputs, so you can’t have a screen with all the outputs and select the one you want as the live broadcast. You can preview each camera before you to switch to it individually, though. If you want multicamera view, you need the bigger and pricier units. This multiview function is now available on the Atem Mini Pro if you plug it into an external monitor via HDMI.
For a truly professional production, it would be best to run multiple cameras
For larger productions, you could move up to the Atem Television Studio HD for £899/$995, which is an eight-channel SDI and HDMI switcher with ten-channel audio mixing and a small screen on the front. You then connect your computer to the Atem using an Ethernet cable or Wi-Fi, and use the Atem software on your screen as the switching software. The bigger Atem units are very sensitive to frame rates and resolutions, so all your input cameras need to be the set to the same. You may have to use a separate format converter device if you use different cameras that can’t be set to match. But the Mini automatically scales video inputs to make things easier.
However, the cheaper Atem Mini doesn’t have multiple camera viewing outputs, so you can’t have a screen with all the outputs and select the one you want as the live broadcast. You can preview each camera before you to switch to it individually, though. If you want multicamera view, you need the bigger and pricier units. This multiview function is now available on the Atem Mini Pro if you plug it into an external monitor via HDMI.
The Atem Mini range also lets you store up to 20 preset images for you to switch to, such as holding pages or titles. For graphics, you can do that in your streaming software such as OBS, but you can also upload them to the Atem Mini as PNG files with a transparent background.
Other options include the Roland V-1HD, which has four HDMI inputs, a full 12-channel audio mixer and two HDMI outputs, all for £899/$995. Roland has a whole range of similar models at different prices and specs.
Of course, managing multiple cameras is not much of an issue if you’re in a nice, warm studio or indoor location with plenty of power sockets and reliable Wi-Fi for steaming. You will need to invest in some lengthy cables and gaffer tape to make sure everything is safe, and then factor in the time to set it all up.
You need to ensure all your cameras are set to the same white-balance and manage exposure carefully. And ideally you want some way of talking to your camera operators during the shoot to direct them. Some of the very high-end systems have this talkback feature built in, but most don’t. Planning, communication and fallback options are crucial. Don’t forget: when broadcasting live, there are no second chances.
8. Going wireless
Sometimes it’s just not possible to get a cable from your camera to your switcher safely. Perhaps you want a shoulder-mount run-and-gun camera to give you maximum flexibility and for unusual camera angles. Or you want to stream where Wi-Fi coverage is patchy.
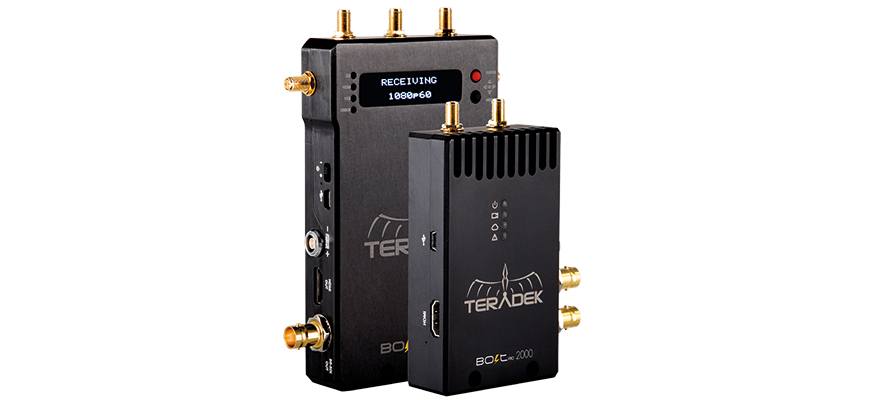
To transmit a wireless signal from your camera back to the switcher, you need a specialist system. These usually are designed for larger cameras and fit on to a V-Lock mount, and they do need power to run – usually from a D-Tap camcorder battery. The £2154/$2750 Swit SW-M150FS system works on both SDI and HDMI cameras and beams its video signal up to 150m to a receiver that plugs into your switcher. Other models from Swit or other manufacturers like Teradek boast an even greater range of up to two miles.
The Bolt 4K Max from Teradek is at the top end and costs around £15,000/$15,000. It is typical of the company that has been at the forefront of TV broadcast for years. The firm offers wireless solutions from very high-end to much more affordable, such as the Vidiu, which fits on top of your camera.
If you need to stream from locations with dodgy Wi-Fi, then a £1510/$1490 Teradek Vidiu Go system could be what you need. It takes an HDMI or 3G-SDI input from your camera, or from many popular video switchers. Then it streams over the combined bandwidth from Ethernet, Wi-Fi, and up to two 3G/4G/ LTE modems, or several iPhone or Android smartphones as hotspots for even more bandwidth redundancy. Each of the modems costs an extra £399/$399. And of course you need cellular data plans for each cellular Wi-Fi dongle.
The Vidiu Go is compatible with Teradek’s iOS video production suite, Live:Air Action, and the VidiU app for iOS, allowing you to quickly configure and monitor the stream, and overlay graphics and lower thirds on to a live feed.
Teradek also offers subscription packages to its Sharelink cloud-based system, which allows multiple-destination streaming, among other benefits. A Basic package is £20/$25 per month and allows for up to 50GB of data.
If there is no Wi-Fi at all and you need to go totally cellular, there are options. One is to use a simple cellular Wi-Fi hotspot, which you can buy from all mobile phone suppliers, but of course this isn’t very reliable – especially if you are an event where others are using their phones and clogging up the bandwidth. A better way is to use a device with cellar bonding. This is using two or more cellular connections bonded into a strong internet connection, and if there is some weak Wi-Fi or Ethernet, then you can add that to the mix, too.
A device like a LiveU Solo costs about a grand and takes up to two cellular data dongles and uses them to create a Wi-Fi network for streaming. You’ll obviously need two 4G cellular dongles and the data plan that goes with them.
Specially designed for pro filmers, the Teradek Link Pro acts like a Wi-Fi hotspot on steroids. It uses Teradek’s Node modems, which use SIM cards from any 4G LTE provider. A kit costs £5073/ $4990 and you also need a subscription to Teradek’s Core platform to make it all work. Serious kit for serious filmmakers, but with Teradek’s systems you can go totally wireless – from cameras to broadcast streaming on location.
9. Switch via the cloud
Most times, you would have your switcher operator on-set, making the cuts and beaming the final signal out to the world. But with Sony Virtual Production, it doesn’t have to be that way. It’s a pay-as-you-go cloud production service that provides an online switcher and streaming to up to three different channels at the same time, including YouTube Live and Facebook Live.
Think about battery power. If your cameras are going to be streaming for a long time, they’ll need ample battery power or AC power
Using wireless Wi-Fi or 4G dongle transmitters on up to six cameras, footage is fed to a virtual production switcher that is hosted in the cloud via Amazon Web Services. A remote operator then logs on via a laptop and switches between camera angles, or adds logos and graphics. It’s like a full outside broadcast live TV unit with just camcorders and a laptop.
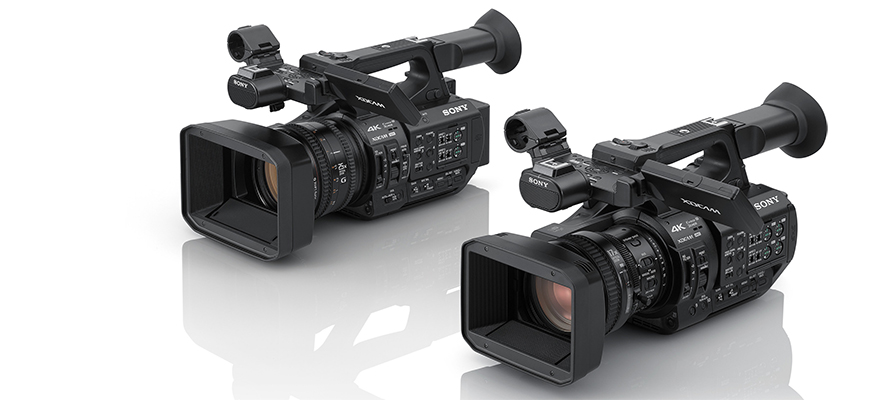
Sony recommends you use its Z280, Z190, Z90 or X200 cameras, but the service made its debut at Red Bull’s Alpenbrevet motorcycle race at Sarnen, Switzerland, where the event was livestreamed using only Sony Z90, X200 and X3000 camcorders, with an FS5 II as backup. As long as your camera has a suitable frame rate, bit rate and resolution, it should work.
If your camera doesn’t have wireless Wi-Fi or can’t take a 4G dongle transmitter, you might need a £1400/$1358 Sony CBK-WA100 wireless adapter, which takes a camera’s SDI signal and uses a 3G or 4G wireless network to upload it to the Sony server.
A starter package is £90 for an hour of broadcast time, while a regular monthly user package is £720 for ten hours of use in a month. A 24-hour, on-off package is £2106, and at the moment it’s all for Europe only.
10. Consider a connected camera
If all this technology sounds a bit extreme, then one of the easiest ways to start livestreaming is to buy one of the latest breed of cameras that are designed for the job. While it’s possible to livestream with pretty much any camera with an HDMI or SDI output, from a mirrorless camera to a cinema cam, camcorders rule the roost as far as streaming-ready cameras are concerned.
The latest Sony Z280 4K costs £7484/ $6950, or the lower-spec Z190 camcorder is £3363/$3748 and both are ready for streaming, as well as Canon’s popular £5998/$6999 XF705. However, the king of connectivity is JVC, and the brand’s HC900 broadcast camera uses interchangeable lenses and sits at the top of the heap, but costs £13,275/$12,900 body only.
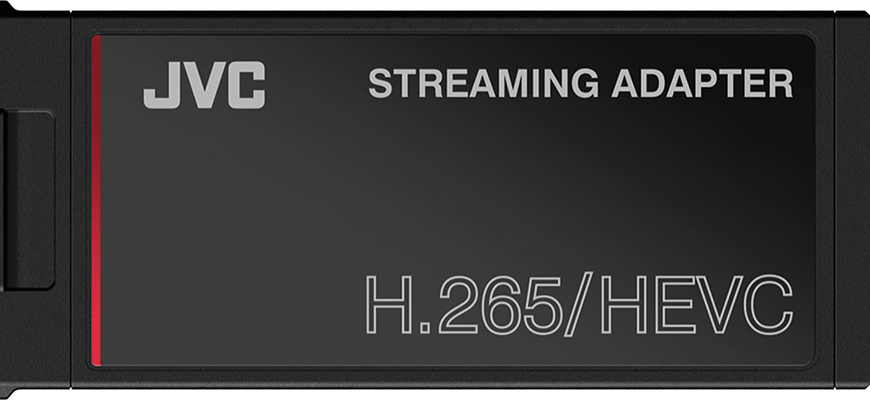
The £3180/$3595 JVC HC500 and big brother HC550 at £4194/$4990 are great buys, but the HC550 has still not hit the shops yet. There are other options, such as the JVC HM660 at £3750/$2995. JVC even recently released a H.265/HEVC streaming adapter for its connected cameras for faster transmission in 4:2:2 10-bit.
Camcorders rule the roost as far as streaming-ready cameras are concerned
Panasonic’s £3200/$3695 CX350 allows video transmission and camera control over Wi-Fi and links up perfectly as part of a multicamera system to Panasonic’s Live Production Centre AV-HLC100, which is a broadcast-standard switcher unit that costs £12,279/$10,499.
The benefits of all these camera is that they can link up to a Wi-Fi network, or use a 4G dongle or bonded cellular system. They can then connect directly to streaming services like YouTube Live or Facebook and stream at the push of a button, or can upload to a cloud streaming service such as Sony Virtual Production or Livestream. They can also record the footage to their own memory cards in higher resolution for editing later. Many have very good zoom lenses, large sensors and quality internal codecs like ProRes.
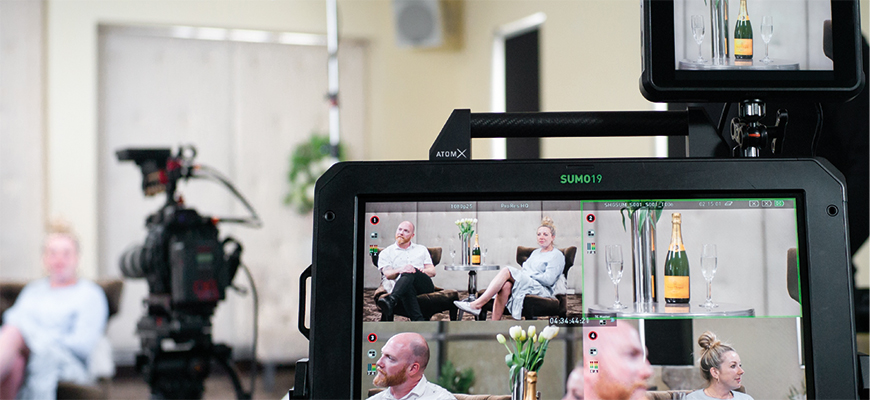
11. Try pioneering Atomos tech
They may have started out as monitors that can also record, but some of the latest Atomos products have now been upgraded to become 1080/60p multichannel recorders and switchers. A free firmware upgrade updates the £1318/$1299 Shogun 7 and £2394/$2495 Sumo 19 into switchers that can record up to four SDI inputs and act as a touchscreen switching unit.
The Atomos units then not only output the switched signal so you can use it as a live stream, but also record that output signal as a fifth stream, with all the fades and cuts you made included in it. Take this edit in Final Cut Pro or DaVinci Resolve, and all five streams are there so you can re-edit the programme by changing the cuts.
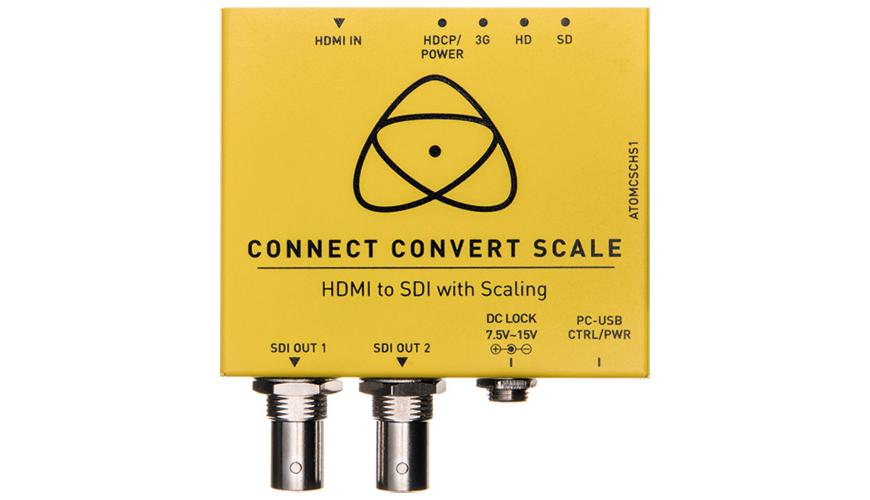
Having only SDI inputs is OK if your camera has these outputs, but for cameras with an HDMI output, you would need a reliable converter such as the Atomos Connect Convert unit, which is £102/$99 per camera. Plus the cables to connect up, of course. Each camera must be outputting the same frame rate and resolution. There must also be a camera plugged into the number-one SDI socket, which provides the time code for the whole broadcast.
You can set up cuts to be either hard cuts or dissolves, and you can adjust the dissolve timing
The Atomos doesn’t have fancy fades or overlays, but you can use one of the inputs from a laptop, for example, with some PowerPoint or Keynote slides or other graphics. For that, you also need an HDMI to SDI converter that scales the signal to the right size. The £234/£248 Atomos Connect Convert Scale HDMI to SDI is ideal.
To switch between inputs, you just tap on the screen and a red outline shows which of the feeds is being outputted as the main programme. You can set up cuts to be either hard cuts or dissolves, and you can adjust the dissolve timing in the menu. However, these are not viewable in the live output, where your viewers only see hard cuts.
These dissolves are only visible when you view the project on your NLE and output it from there. An alternative way of switching is to set up so that you tap the source you want to switch to, which puts a green frame around it and shows it’s all cued up. Then when you’re ready, tap again and it turns red, and becomes the output channel.
For audio, the unit can be set up to either stay with one separate audio input, such as from an external mic unit or audio mixer. For this, you need an Atomos breakout cable to allow you to plug your XLR feed into the Atomos. Alternatively, it can take the audio from each camera that you are switching to. So, one might have a reporter with a handheld mic, for example.
The beauty of the Atomos Shogun 7 especially is that it’s not an extra bit of kit, but one many filmmakers will have or could find lots of uses for – for example, as an external camera monitor or recorder to convert your camera output to ProRes Raw or ProRes.
Top tips for live streaming
- Get it right first time, every time. There is no chance to ‘fix it in post’, as everything has to be right first time and tested before you go live. It’s like broadcasting live TV so you ideally need to rehearse what’s going to happen, as well as getting used to all the technology involved.
- Bandwidth is king. You have to ensure there is lots of internet bandwidth to get your HD stream out to the world, which often means a wired internet connection rather than relying on 4G or Wi-Fi. And consider that when you are streaming, others may be accessing the Wi-Fi and slowing
it down. - Consider having a remote camera focused on a key view that you can switch to if needed. It could be on the stage where a presenter will be standing, or a general view of an event. If any main cameras have an issue, you can always cut to your remote camera for some continuity. It’s better than a blank screen.
- Think about battery power. If your cameras are going to be streaming for a long time, they’ll need ample battery power or AC power to keep them running. And mirrorless cameras can overheat, so watch out and test before a big job.
This article first appeared in the Summer 2020 issue of Pro Moviemaker Magazine.